Wednesday, October 30, 2013

How do you price hand made items?

This is a common problem for any one trying to get into selling their hand made items. How do you determine a price? What is fair? How do you compete with others making similar things?

You don't really want to charge for your time, because prices could skyrocket. I could get away doing this for some items, if I charge $5/hr and no more. For example, I can do a pair of simple booties in 3-4 hours, so that would be $15 or $20...I charge that for some booties, but the very basic ones I charge less. Would you be willing to pay that much for a solid color pair of booties? Maybe, but only because they are hand made. And if I up my rate to say $7 or even $10 an hour (which is still low-balling the worth of my work by just barely hitting what baby sitters make, and is a good deal less than what I make at my day job being a receptionist/admin), then the prices are getting to $21-$28 or $30-$40 per pair of booties. Now would you be willing to pay that for a simple pair of booties? Probably not. And I reiterate this is a simple pair. The roller skates, for example, take considerably longer as I am making and attaching 8 wheels. If I charged by time, the cost would almost double. Even going back to charging $5/hr, that is $30-$40 per pair of roller skate booties. Seems a bit outlandish, doesn't it? An afghan, which takes me about a week (let's say 15 hours), would cost $75. Maybe for a full/adult sized afghan would you be willing to pay that, but probably not for a baby sized afghan...

So...realizing hourly wage is in no way fair to me or you, I've done a fair bit of research online trying to figure out how to fairly price my products. The simplest and least concrete method is to look at similar items on etsy (or other shops like artfire, etc) and see what other people are charging, then determine where in this range your product falls with you feeling like you can actually make a decent profit. I did this at first when I opened my shop as Caiti Scarlet Designs and carried jewelry. This worked for me, and I found prices that I felt were competitive without cheapening my product, and I was happy with the return. However, if you shop around, have a lot of business, the right connections, or other crafty friends, you can buy in bulk and save a lot there as well so this method isn't likely to hurt you. Not so much with yarn...

I've come across 2 reasonable ways that other yarn crafters have used. Method 1 involves measuring your yardage and charging by the yard. The amount I saw was $0.05 per yard. This is rather fair, although does not fully compensate any embroidery, stuffing, eyes, beads, or other embellishments. But as far as a base goes, I find it fairly reasonable. Also, this was a year or so ago, so the recommended rate per yard may have even jumped. The only problem, other than lack of compensation for other materials, is that you need a way to determine your yardage. This can be done by weighing your yarn (in whatever way makes sense to you...such as the skein before and after, or the finished project, etc). Just use the provided info on your yarn label and do a quick equation of total weight multiplied by yarn over grams. There are also nifty little yardage counters you can use while knitting up your item.

Now I find the need to weigh my yarn or run my yarn through a a counter a bit finicky and annoying. Also, I don't like the fact that it doesn't provide an easy way to accommodate for your other materials. Because of this I use Method 2, which is basically charging 3 times your total material costs for the product. This also provides a fair and reasonable price, and it is a bit easier to figure out than the previous method.

I usually stick to this method...it is simple to follow and gives me pretty even pricing across products. However, when selling online there are fees to consider. If you do not want your fees to cut into your profit, consider adding 10% to the price. That isn't an arbitrary number, and I'll show you how I came up with it, but for those of you looking for the quick answer, there it is.

The Basic Process:
Base Price: 3 x materials cost
Etsy Listing Fee: $0.20
Etsy Selling Fee: 3.5% Base Price
Paypal Fee: 5% Base and Shipping


OR 110% x (3x materials cost)


          An Example: a typical infant afghan (priced at $35)
Materials: 3 skeins yarn @ $3.99 each (excludes tax)
Materials Cost: 3 x $3.99=$11.97

Base Price: 3 x $11.97=$35.91
Etsy Listing Fee: $0.20
Etsy Selling Fee: 3.5% x $35.91=$1.26
Paypal Fee: 5% x ($35.91 + $10.95*)=$2.34

Total Price: $35.91+$0.20+$1.26+$2.34=$39.71

$39.71÷$35.91=1.106 or 110%

*assuming priority mail medium flat rate box

Friday, October 25, 2013

Simple Origami Box

I've been doing origami (the Japanese art of paper folding) since I was about 6. My best friend all through grade school had moved to American from Japan in Kindergarten. We became fast friends and spent a lot of time together. I remember all the time spent at her house, where they all still spoke Japanese, the trips to the Japanese mall (then it was called Yohan, now it is known as Mitsuwa), watching anime and reading manga with Shiho translating everything for me, learning enough Japanese to insult someone (that's what's important when you are under 10!). I also remember Shiho teaching me origami and my fast obsession with it.

Nowadays I don't do it as much as I used to. I find neat ways to use origami for decoration or gift wrapping though. Sometimes if I have a small gift, I'll even make a box (and if you ever ordered from me when my shop was Caiti Scarlet, then you received your purchases in origami gift boxes). If you ever run into me at my day job, you will notice I tend to whip them up for small candies as well...


Because I am lazy and did not want to waste paper testing out different boxes, I turned to Google and found this little gem. Simple, and larger than the "standard" box I usually make (and was avoiding in order to fit all my mints in there). This is a great basic box, and it is so easy beginner's should not have trouble.

If you are interested in the mints, they are home made butter mints. I've been wanting to make them forever and found this recipe online. Just like bread, the humidity will affect your dough and I found myself using closer to 4 cups of powdered sugar. I also do not much care for peppermint, so I picked up some "Pure Mint" extract instead. It's kind of a fresh mint/spearmint mix. I also found myself using much more extract...at least 1 tsp, and probably closer to 1.5. Don't take this to mean you should use this much though, especially if you are using peppermint (I think it is much stronger). It was easy to add more in at the end, so follow Averie's advice

Wednesday, October 23, 2013

Winter Wedding Mittens

Following off of last week's Shop Info post, I am working on an order for someone local who knows me and the kind of projects I get myself into (If you want to know what I am talking about, check out my Sent Swap Packages album on flickr...sometimes I am rather ambitious n_~). This girl is having a winter wedding and saw an adorable wedding picture on Pinterest where the bride and her bridesmaids were out in the snow in their dresses, and all the bridesmaids had on coordinating mittens. So her request is that I make 6 pairs of different mittens in her colors: grey, teal, and white.

I've been spending the past few weeks swatching away, trying to come up with neat ways to pattern the colors for the bride to choose from. Some of these designs actually lend themselves to being repeated, depending on which color is made dominant. I started without a swatch of the dress color, just to get some ideas of how the colors would work up, figuring I can also get more accurate colors for the actual mittens if necessary. 
these are the mock swatches the bride chose,
click the picture to see a .pdf of all the ones I came up with
I also spent some time hunting for generic mitten patterns or formulas. I would just figure it out on my own, they are a rather basic construction, but I have incredibly tiny child hands so am a bit concerned about making them too small. I looked around and found a lot of patterns using similar stitch counts and measurements for an average woman's mitten, so instead of making a striped swatch I made a striped mitten using this information for the bride to try on.
Mitten picture forthcoming...

The bride also wanted buttons like in her inspiration picture, but thought that sparkly snowflakes would be cuter. I have been browsing around and collected a few different ones for her consideration. We may explore other options, but the rhinestone snowflakes seemed to be the best looking sparkly options.
click to enlarge for detail,
but this image best represents actual sizes
(UL: 3/4", LL: 7/8", R: 1")
The wedding is not until winter of 2014, and the bridesmaids won't be picking their dresses until February so I have a bit of time. Luckily Christmas knitting won't interfere at that point, so as soon as dresses are picked and the teal color is finalized I will be speeding my way through these mittens. Expect to see the finished order on my blog and in my shop early next spring. If you are interested in something similar, just contact me*!

* I am very easy to get a hold of...Send a message or post a comment on Facebook/Google+, comment here, use the email button on the side bar, etsy convo me, or use the "Request Custom Item" button in my shop n_n 

Friday, October 18, 2013

Fancy Bows

Well it's that time where we begin decorating for the next 3 months (at least in the States). Every year my mom gets pretty serious and has me help her with window boxes. Usually only for Christmas do I need to make fancy bows, but this year I will be doing so for Halloween as well (she got some pretty neat ribbon).

The first time I ever had to make these bows, I was a bit at a loss and had to google my way through the process. This is the first bow I made in this style:

and a picture of the entire window box n_n
In order to help anyone else that may be stumbling their way through the same process, I have decided to share this tutorial by Chica and Jo. The written part is very detailed and accompanied by a ton of helpful photos.

I also I found this youtube video by craftsdotcupcake that shows the process really well. She has a blog too full of other crafty ideas and tutorials.

I will make a small note...sometimes the ribbon you want to use doesn't lend itself to this specific design of bow. The ribbon I am using for the Halloween bows for instance is much to wide. I could make a bow in this style but it would be ridiculously wide. It also lacks wire, which I find lends itself to this bow style the best. Because of this, we had to settle for a different bow for the Halloween window boxes:

My mom's display in the front garden
For this bow I just looped the ribbon in an S instead of an O as in the tutorials, and because there was no wire edging the loops only spread a little bit which created a more "normal" style of bow.

Wednesday, October 16, 2013

Handmade for Adults

I thought now would be a good time to take advantage of Shop Info Wednesday to remind you that while most of my stock and products are for infants, I can and will venture beyond that scope. I can make items for older kids, adults, household use, and even decoration. In fact, this is my usually fare for non-shop projects (just ask my friends and family...they receive a lot of them!).

Would you like some examples*? OK!

One of the gifts I give that get rave reviews are actually wash cloths...seriously. They are knit from cotton and have a decent texture for scrubbing if necessary. My mom asks for more all the time! I've started expanding them in to kitchen and bath sets as well

I also make clothing and accessories that will fit anyone from baby to adult, although there are some caveats to that. As I have designed very few items myself (especially clothing-wise), I am limited to patterns where the designer has given express permission to sell items made using that pattern. Unfortunately this means you cannot just link me to a pattern and request I make it for you and get paid...I want to respect the designer's rights. As such, some projects you may see on my flickr, blog, or Ravelry may not be reproduceable for purchase. However, I am willing to help you find a pattern that I can sell items from and work with you from there.
In fact, there are some items that can be easily designed without infringing on designer rights. For example: socks, mittens/gloves, hats, and scarves. There are many basic patterns or formulas and a variety of free stitch patterns (e.g. cables, checked, lace) that can be fairly easily implemented into these items. I am actually working on a project right now involving 6 pairs of mittens in the same 3 colors but with varying stitch patterns (more on this next week!)


*If you want further examples, check out my flickr...I am slowly updating it to have all my Ravelry projects and shop products in there.

Friday, October 11, 2013

Free Pattern Friday: Katamari Edition

Last year I made my 19 year old brother a Katamari set for his birthday. Lucky for me, my brother is awesome and totally appreciates hand crafted items. Now he is picky, so I only make things he specifically asks for (or otherwise obviously implies) he wants. I had shown him the magnetic Katamari ball, because this is one of his favorite games, and he thought it was very cool and practically demanded one. The Prince not so much, but he's like me in some regards so I knew he would appreciate the set (and he did! They now have pride of place on his speakers).

Now the patterns came from two different sources, so you get a twofer today n_~

Amy Shimel's Magnetic Katamari pattern is posted on her blog and very easy to follow. You only need to know single crochet and increases (and how to start working in the round, Amy recommends the magic circle), as the ball itself is made in two halves.

She does recommend a certain type of magnet (Darice 3/4" which come in a pack of 8 for $2.50, but you will need 28 magnets so that is 4 packs). This is because she had come across other magnets for better prices (50 for $5), but they were not strong enough. Now I couldn't find the Darice magnets, and Hobby Lobby is the most convenient craft store for me to get to (it's just 2 blocks away from my work...also I am lazy and don't like to drive out to Michael's or JoAnn's unless I have another purpose). They carry a generic (Tree House Studio) brand of ceramic magnets with a magnet strength of 6, and they worked just fine. You can get 8 for $2.50 or 50 for $7.99, so this is another option for you or just some info on the kind of magnet that works.

Check out Amy's pattern and make your own magnetic Katamari. Then have tons of fun playing with it!

Keiko Kikuno's Katamari Damacy Prince pattern is also free. I found it on Ravelry, but it is hosted on Google Docs so anyone can access it. I found it pretty easy to follow and only changed one thing. Most amigurumi worked in rounds is worked in spirals, which is fine for solid colors, but color changes can lead to not quite perfect shapes. In the pattern the face is worked into the head, so the peach patch becomes more of a rhombus. The edging can probably correct this, but I opted to make the head solid green and make a flat rectangular patch to sew on for the face (12 stitches by 12 rows).

Check out the patterns, and the games! They are generally goofy, but a lot of fun (for beginner and advanced gamers). If you make your own toys, please share and make sure to tell the designers you liked their work!

Wednesday, October 9, 2013

Shop News

Hello everyone!

It's been just over a year since I relaunched my shop on etsy. It was a soft opening, but things have picked up over time and everything is going rather well right now. I'm not super busy, which is good because I am not swamped and I have time to get all my orders done, but I wouldn't say no to a few more customers.

The holiday season is slowly closing in, and I thought now might be a good time to shake things up a bit and try to get some social networking going on. I'm still working out the specifics of how to set this up in etsy, but I am planning a few promotions:

First Time Customer
If it is your first time ordering from Handmade by Caitlin, you will receive free shipping.

Referrals
If you follow me on etsy, Facebook, twitter, or Google+ and refer a friend, you will both get a 10% discount on your next order! Network user name will be needed for confirmation of course, and your friend need only enter your name in notes to seller upon their first order. You will both then receive a code to use on your next order.

Free Holiday Plush
If you spend $30 or more at my shop, you will receive a small holiday plush for free. (I am still working out which one(s)...if multiple you may have choices!)

Other Ideas?
If you have suggestions on offers or promotions you would like to see, products you want available, or if you just have fun ways of sharing my shop, post them here! Remember, my shop is all about YOU! I wouldn't be here without you, so I want to know what you want and what makes you happy n_n

Friday, October 4, 2013

Free Pattern: Fierce but Friendly Dragon

This week's free pattern is a bit more advanced, but still adorable. Last year I participated in a Harry Potter swap (Ravelry is full of swaps, and if you are a member I highly recommend the Odd Duck Swaps group...3 new themes every month and they are very good about making sure everyone gets their package). Anyway, I made this little guy as part of the swap, because dragons.
Now this pattern does assume you have a decent knowledge of and comfort level with crochet, so unfortunately I would not recommend this for a beginner. However, I would not say it is overly advanced either.

The pattern is LucyRavenscar's Fierce Little Dragon. This link is to an updated version made available as a free Ravelry download. It is well written and formatted (printer friendly!), and I found it rather easy to follow. If you are not on Ravelry, you can get the original version of her pattern as well, but it is not as clear or easy to follow.

Wednesday, October 2, 2013

More Custom Order Reveals

The turtle plush I made last week and posted teasers of on facebook is finished. The little girl it was given to loves it and I am told the little guy has made it as a bed toy.
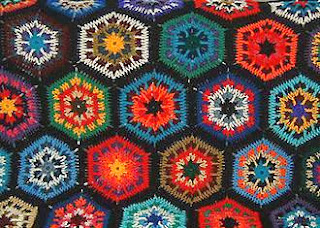
I had already had a second order sight-unseen for another one, and when this little guy was delivered the requester confirmed wholeheartedly that she wanted one. The next turtle will be in the typical greens and tans. Later that evening I got an order for a second one with a slightly different theme. The turtle will be green, and his shell will be made to mimic native american motifs. I am thinking this granny square/hexagon pattern will achieve that:
blanket (c) Avalanche on ravelry

The Three Strikes for Sean donation was picked up yesterday. The lady who had reached out to me was happy with the results.

It is also time to start thinking about Christmas gifts! I know, I have almost 3 months, but I make most of my family's gifts (at least the girls, so that's mom, grandma, sis 1, and sis 2...maybe the boy's mom, grandma, and sister...whew!). My one sister has already given me her knit item wishlist! Luckily, she wants fairly simple things (and she knows it, and she knows I need time to work, so I love her not only for her choices but early notice n_n). I still need to plan out the others...

My shop is also picking up speed. It's still mostly local and in person orders from family, friends, coworkers, and friends of acquaintances but the online sale trickles in here and there. I am hoping to come up with some cute Christmas and winter themed items as well, once I finish up the sets and custom listings I have planned to work on this month. So hopefully between my connections and the upcoming Christmas season, things will be getting busy on the shop front too!

Oh, the holiday season is upon us and it's not even Halloween*!

*stay posted for a Monday post about Halloween at my house...we are hard core!